Blogging has become a popular way to share thoughts, ideas, and information with a wide audience. And with the rise of platforms like WordPress, creating a blog website has never been easier. In this guide, we will walk you through the process of creating a professional WordPress blog in just 8 easy steps. Whether you’re a beginner or have some experience with website building, this guide will help you set up and launch your own blog in no time.
One of the great things about using WordPress is its flexibility. It can be used for a wide range of website types, from personal blogs to e-commerce sites, and everything in between. And with thousands of customizable templates and themes available, you can easily create a unique and professional-looking blog that reflects your personality and brand.
Another great advantage of WordPress is its ease of use. Even if you have little to no experience with website building, you can still create a blog with ease. The platform is user-friendly and intuitive, and it comes with a wide range of tools and features that make it simple to add content, customize your design, and promote your blog.
Whether you’re looking to share your thoughts and ideas with the world, promote your business, or build a community around your blog, WordPress is the perfect platform to get started. With this guide, you’ll learn how to create a professional blog website in just 8 easy steps.
Key Preparations For A Successful WordPress Blog Website
Before creating a WordPress blog website, it’s important to prepare a few things to ensure a smooth and successful process. Here’s a list of things to consider:
- Purpose of your blog: Before you start, it’s important to know what your blog is about and who your target audience is. This will help you choose the right theme, design elements, and content for your website.
- Domain Name and Hosting: Choose a domain name that is memorable, easy to spell, and reflects your brand. You will also need a hosting provider to store your website and make it accessible to the public. Research different hosting providers and choose one that suits your needs and budget.
- Content: Start thinking about the content you want to publish on your blog. This includes blog posts, pages, and other media such as images and videos. Plan out your content calendar and have a few blog posts ready to go before launching your website.
- Design: Decide on the overall look and feel of your website. This includes choosing a theme, customizing your website’s appearance, and deciding on the color scheme, font, and other design elements.
- Plugins: Consider what functionality you want your website to have and research the necessary plugins to add those features. Popular plugins include social media sharing, contact forms, and SEO optimization.
- Time and budget: Creating a WordPress blog website can take anywhere from a few hours to a few days, depending on your experience and the level of customization you want. Be sure to set aside enough time and allocate a budget for purchasing a domain name and hosting, as well as any paid themes or plugins.
By preparing these elements in advance, you can streamline the process of creating your WordPress blog website and ensure that it is a success.
How To Create A WordPress Blog Website
If you are all set to start creating a professional and successful WordPress blog website then let’s go through the step-by-step guide on how to create a WordPress blog website.
Choose A Domain Name And Hosting
A domain name is the address of your website (e.g. www.example.com) and hosting is the service that provides storage and maintains your website on the internet.
Choosing a domain name:
- Your domain name should be memorable, easy to spell and type.
- Avoid using hyphens and numbers as they can be easily forgotten.
- Consider your target audience and choose a domain name that reflects the purpose of your website.
- Try to choose a.com extension if possible, as it is the most recognizable and trusted.
Choosing a hosting provider:
- Look for a hosting provider that offers reliable and fast server speeds, 24/7 customer support, and regular backups.
- Choose a hosting plan that provides enough storage and bandwidth for your website’s needs.
- If you’re starting a new website, a shared hosting plan can be a cost-effective option.
- If your website is receiving high traffic, consider a VPS or dedicated server to ensure it can handle the load.
Recommendations for domain and hosting providers:
- For domain names, you can consider providers like Namecheap, GoDaddy, and Google Domains.
- For hosting, popular options include Bluehost, SiteGround, and WP Engine. These providers offer easy setup, managed WordPress hosting, and reliable performance.
Note: Choose a domain and hosting provider that fits your budget, website requirements, and technical expertise.
Install WordPress
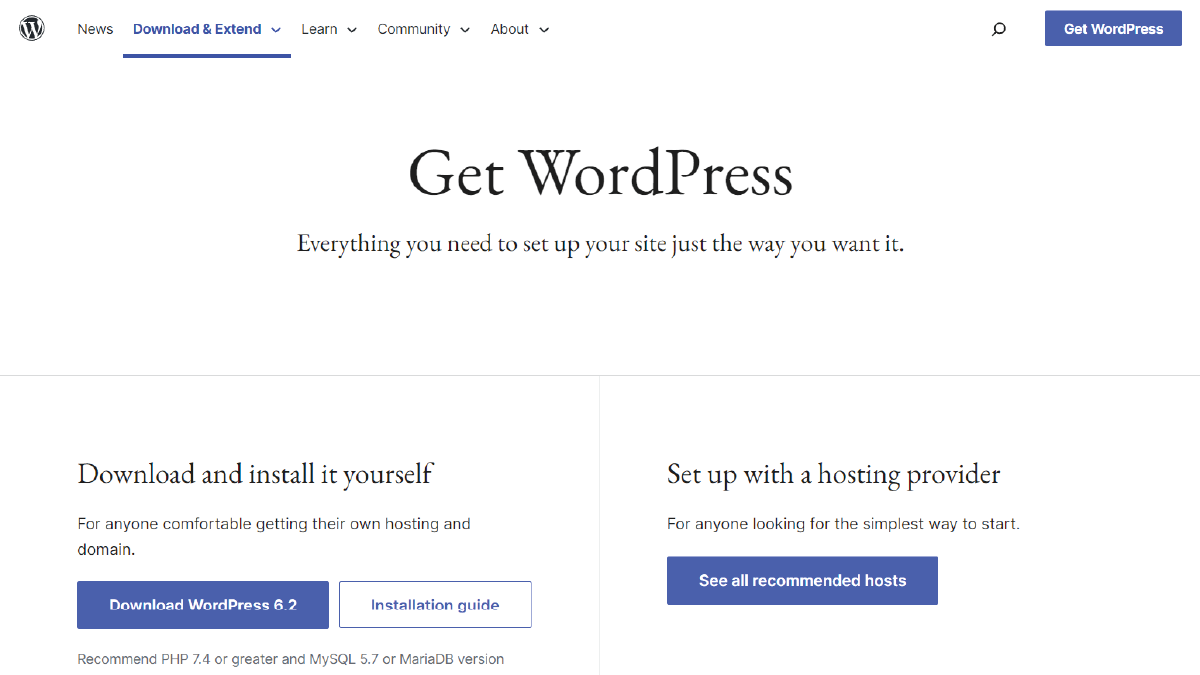
Installing WordPress is the next step after choosing a domain name and hosting for your blog website. Here’s a detailed explanation of the process:
WordPress Installation Process:
- Log in to your hosting account and find the website builder or application installer (such as cPanel or Softaculous).
- Click on the WordPress icon and follow the instructions to set up the installation.
- Fill out the basic information, such as the site title, username, password, and email address.
- Choose the domain name you want to install WordPress on.
- Click the “Install” button to start the process.
Installing WordPress with a Hosting Provider: Most hosting providers offer one-click WordPress installation as part of their service. This process eliminates the need to manually set up the database, configure the settings, or upload files. Simply follow the instructions provided by your hosting provider to install WordPress with ease.
Overview of Installation Options: There are several options for installing WordPress, including:
- Manual installation: This involves downloading the WordPress files, uploading them to your server, and setting up the database and configuration file manually.
- Automated installation: Many hosting providers offer automated installation through a control
The panel, such as cPanel or Softaculous, makes the process easier and faster.
- WordPress Hosting: Some hosting providers specialize in WordPress hosting and offer pre-configured environments optimized for WordPress, which can simplify the installation process.
Regardless of the option you choose, make sure to follow the instructions carefully and back up your website regularly to ensure its security and stability.
Choose A Theme
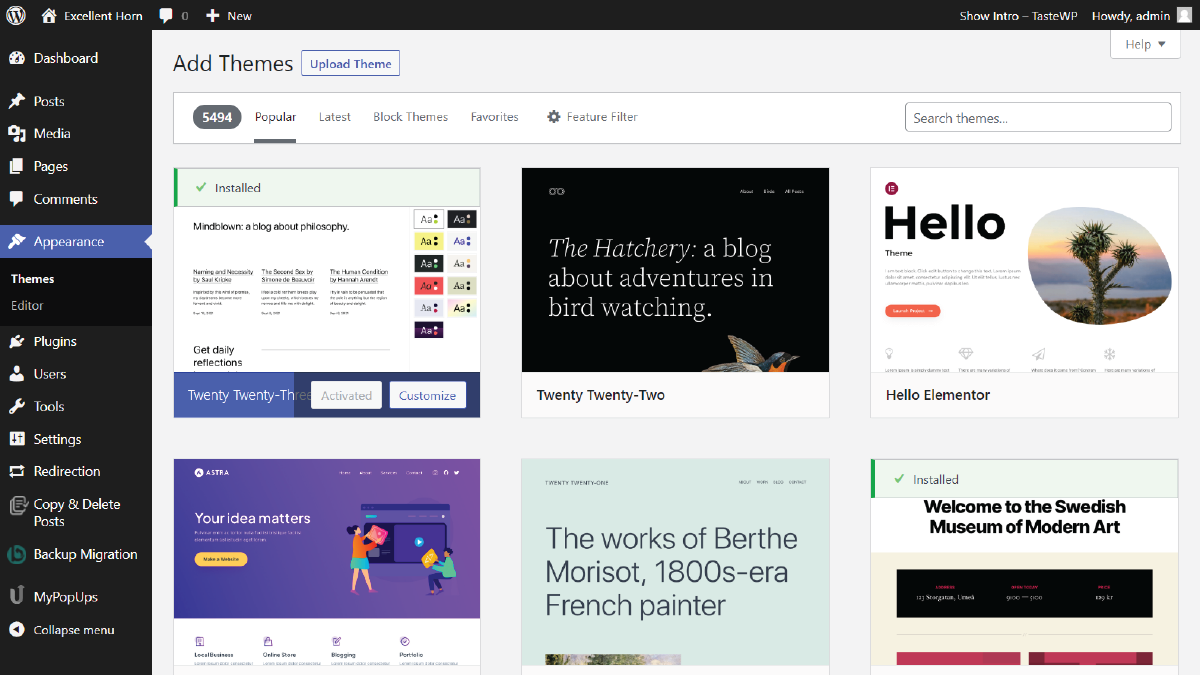
Choosing a theme for your WordPress blog is an important step in creating a successful website. Here’s a detailed explanation of how to choose a theme:
WordPress themes are templates that determine the design, layout, and functionality of your website. They control the way your content is displayed and can add features such as custom menus, widgets, and page templates.
How to Choose a Theme:
- Determine the purpose and niche of your blog to help you find a theme that fits your needs.
- Consider the design and layout of the theme, including font, color, and overall style.
- Evaluate the theme’s functionality, such as its responsiveness on different devices, and the availability of customization options.
- Check the theme’s ratings, reviews, and support to ensure it is reliable and well-maintained.
WordPress offers both free and paid themes. Free themes are a good option for beginners or those on a budget but may have limited functionality and customization options. Paid themes offer more features and support, but come at a cost. It is always recommended to choose an Elementor-optimized Top WordPress theme.
An Elementor-optimized WordPress theme is a theme that is specifically designed to work with the Elementor page builder plugin for WordPress. These themes are built to take full advantage of Elementor’s features and capabilities, providing a range of customization options, compatibility, and performance optimizations.
Elementor-optimized themes are a good choice for WordPress users who want to create a custom website design without the need for coding or technical skills. The Elementor page builder provides a drag-and-drop interface for designing pages and posts, making it easy to customize the look and feel of your website.
By choosing an Elementor-optimized theme, you can benefit from a theme that is designed to work with Elementor, ensuring compatibility, performance, and ease of use. This can make it easier to create a unique and professional-looking website, without the need for technical skills or coding knowledge.
WP Elemento offers the ultimate collection of WordPress Elementor Themes so you can check out our huge collection of Elementor WordPress themes and find one that suits your requirements.
Customize Your Website
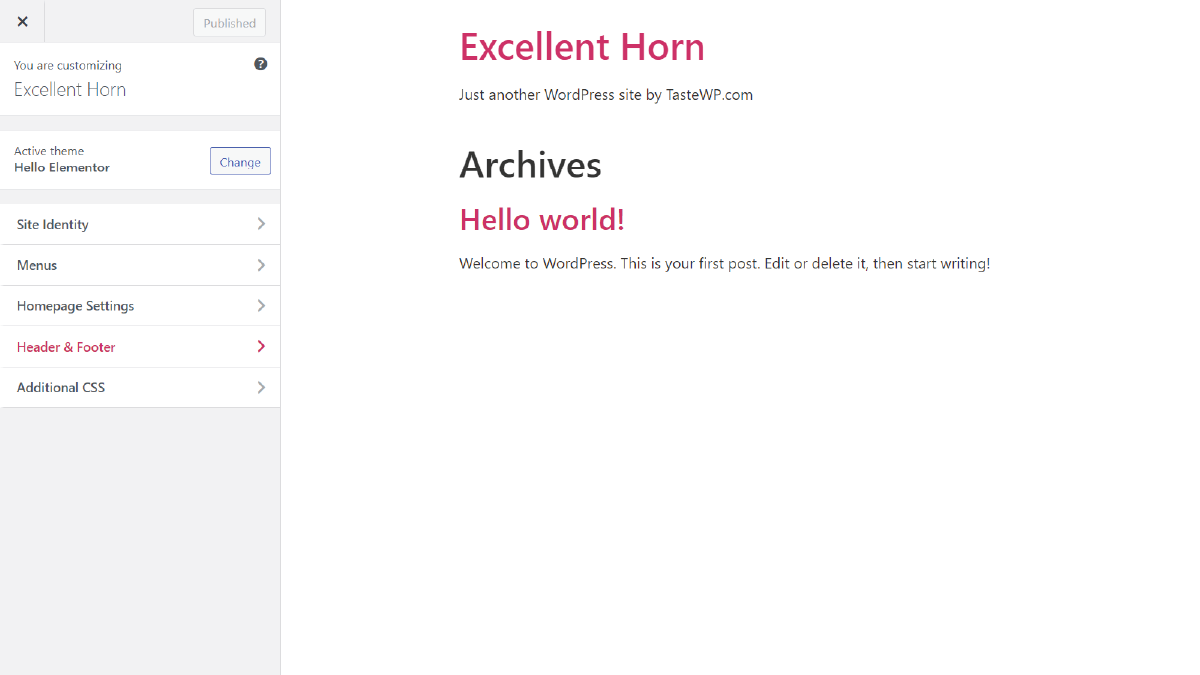
Customizing your website after choosing the right theme is a crucial step in creating a successful WordPress blog. Here’s a detailed explanation of how to customize your website using Elementor:
Explaining Customization Options: Customization options refer to the ways in which you can alter the appearance and functionality of your website. This can include changing the layout, font, color, images, and adding custom widgets and menus.
How to Customize Your Website’s Appearance with Elementor:
- Login to your WordPress dashboard and navigate to the “Elementor” section.
- Choose the page or post you want to customize.
- Click on the “Edit with Elementor” button to launch the Elementor page builder.
- Use the drag-and-drop interface to add and customize widgets, change the layout, and customize other aspects of your website’s design.
- Preview your changes in real time and make adjustments as needed.
- Once you are satisfied with your changes, save them and publish your updated website.
The customization options available will depend on the theme you have chosen, but with Elementor, you will have access to a range of customization options, including the ability to add custom widgets, change the layout, and customize the appearance of your website.
Widgets are pre-built elements that can be added to your website’s sidebars, footers, or other widget-ready areas. Menus allow you to organize and present the pages and categories of your website in a structured and easily accessible manner. With Elementor, you can use the drag-and-drop interface to add and customize widgets and menus, making it easy to add custom functionality to your website.
Create Pages And Posts
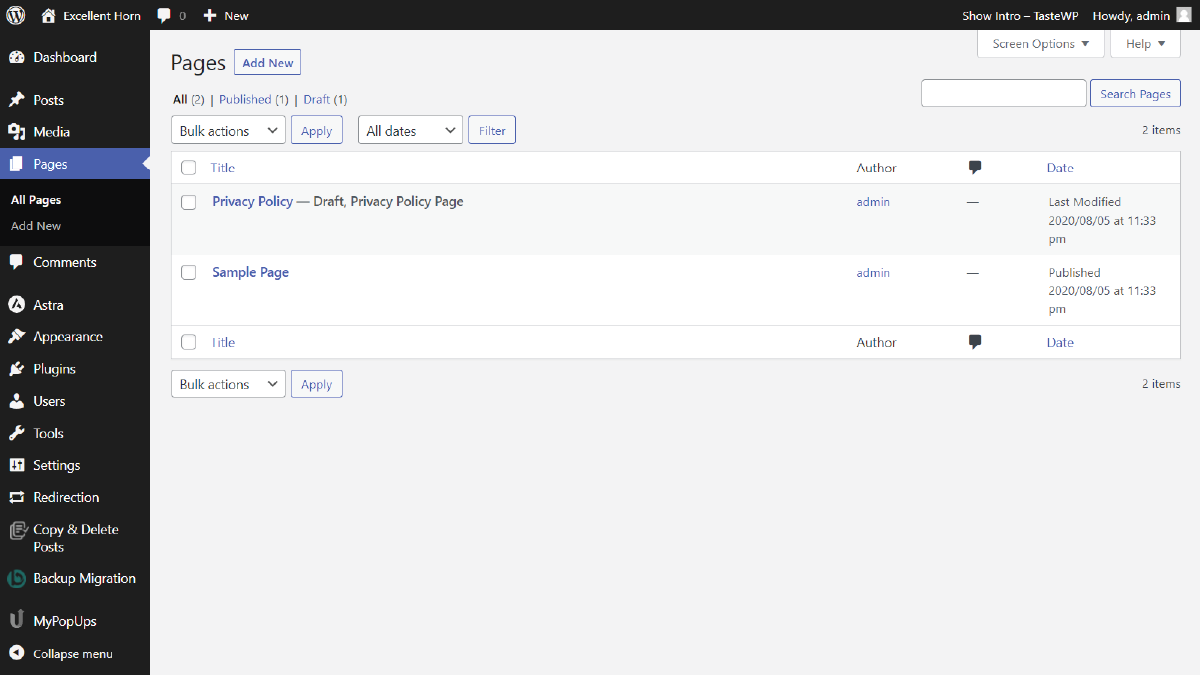
After customizing your website, the next step in creating a successful WordPress blog is to create pages and posts. Here’s a detailed explanation of how to create pages and posts in WordPress with Elementor:
Explaining Pages and Posts: In WordPress, a page refers to a static piece of content that is part of the main structure of your website, such as the “About” or “Contact” page. A post, on the other hand, is a piece of dynamic content that can be organized into categories and tagged, such as a blog post or news article.
How to Create Pages and Posts in WordPress with Elementor:
- Login to your WordPress dashboard and navigate to the “Pages” or “Posts” section.
- Click on the “Add New” button to create a new page or post.
- Click on the “Edit with Elementor” button to launch the Elementor page builder.
- Use the drag-and-drop interface to add text, images, and other elements to your page or post.
- Preview your changes in real time and make adjustments as needed.
- Once you are satisfied with your changes, save them and publish your updated page or post.
WordPress supports several different post formats, including standard, video, audio, and gallery, among others. These post formats allow you to display different types of content in different ways, making it easy to create engaging and attractive posts for your audience.
There are again two most important factors in creating and customizing posts or pages i.e., categories and tags. These are two of the main ways to organize your WordPress posts. Categories are broad, general groupings of related posts, while tags are specific keywords that help to further categorize and describe your posts. By using categories and tags, you can make it easy for your audience to find the content that interests them on your website. If you’re new to WordPress and want to learn how to add blog posts, this step-by-step tutorial on how to add blog post in wordpress will show you how to do it.
Install Plugins
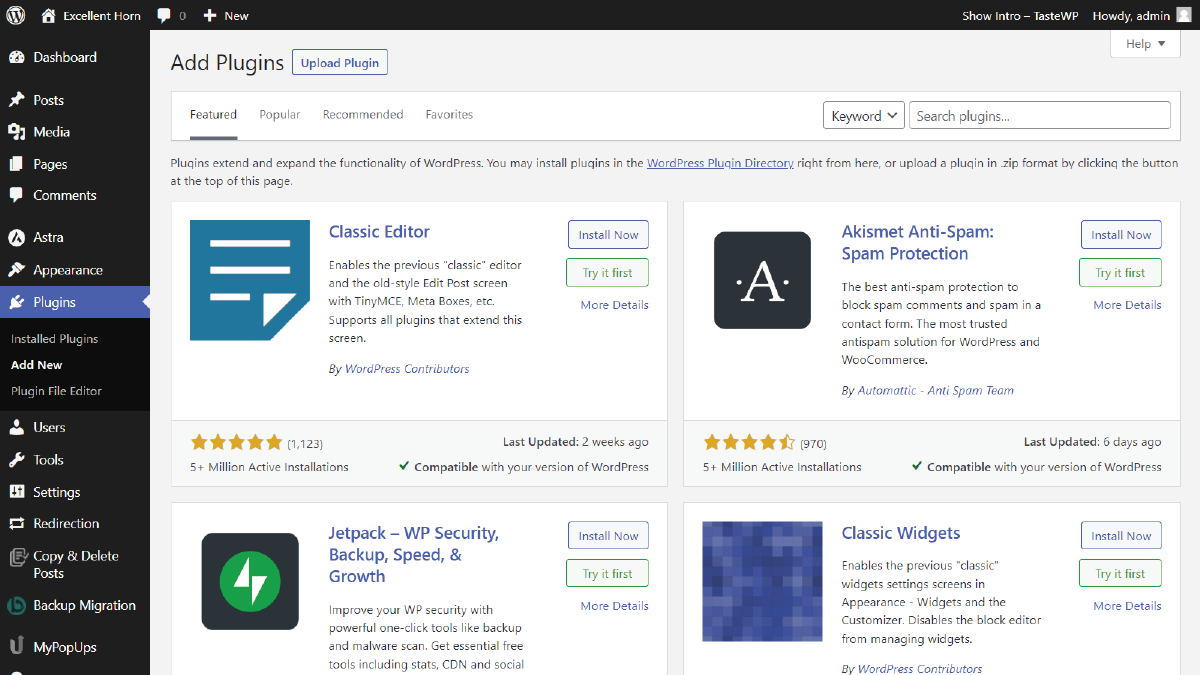
After creating pages and posts, the next step in creating a successful WordPress blog is to install plugins. Here’s a detailed explanation of the install plugins step, including what plugins are, which plugins are essential for WordPress blog websites, and how to use them to enhance your website:
Explaining What Plugins Are: Plugins are small software programs that extend the functionality of WordPress. They add new features and capabilities to your website, allowing you to do things like improve your website’s security, optimize your website for search engines, or add new forms and contact forms.
Essential Plugins for WordPress Blog Websites:
- Security Plugins: To keep your website safe from hacking and other security threats, consider installing a plugin like Wordfence or iThemes Security.
- SEO Plugins: To improve your website’s search engine optimization, consider installing a plugin like Yoast SEO or All in One SEO Pack.
- Backup Plugins: To protect your website’s data and content, consider installing a plugin like UpdraftPlus or Jetpack.
- Contact Form Plugins: Consider installing a plugin like Contact Form 7 or Gravity Forms to allow your audience to get in touch with you.
- Social Media Plugins: To make it easy for your audience to share your content on social media, consider installing a plugin like Jetpack or Social Warfare.
How to Install Plugins in WordPress:
- Initially, you will need to log into your WordPress dashboard and navigate to the “Plugins” section.
- Click on the “Add New” button to search for new plugins.
- Search for the plugin you want to install and click on the “Install Now” button.
- Once the plugin is installed, click on the “Activate” button to start using it on your website.
Plugins are a powerful tool for enhancing your website and adding new functionality. Check out these top 5 WordPress plugins for blog if you wish to improve your blog website’s functionality. To use them, simply install and activate the plugin, and then follow the instructions provided by the plugin’s developer to set it up and start using it on your website. Some plugins may require additional configuration or customization, but most are straightforward and easy to use, even for those with limited technical skills.
Add Media
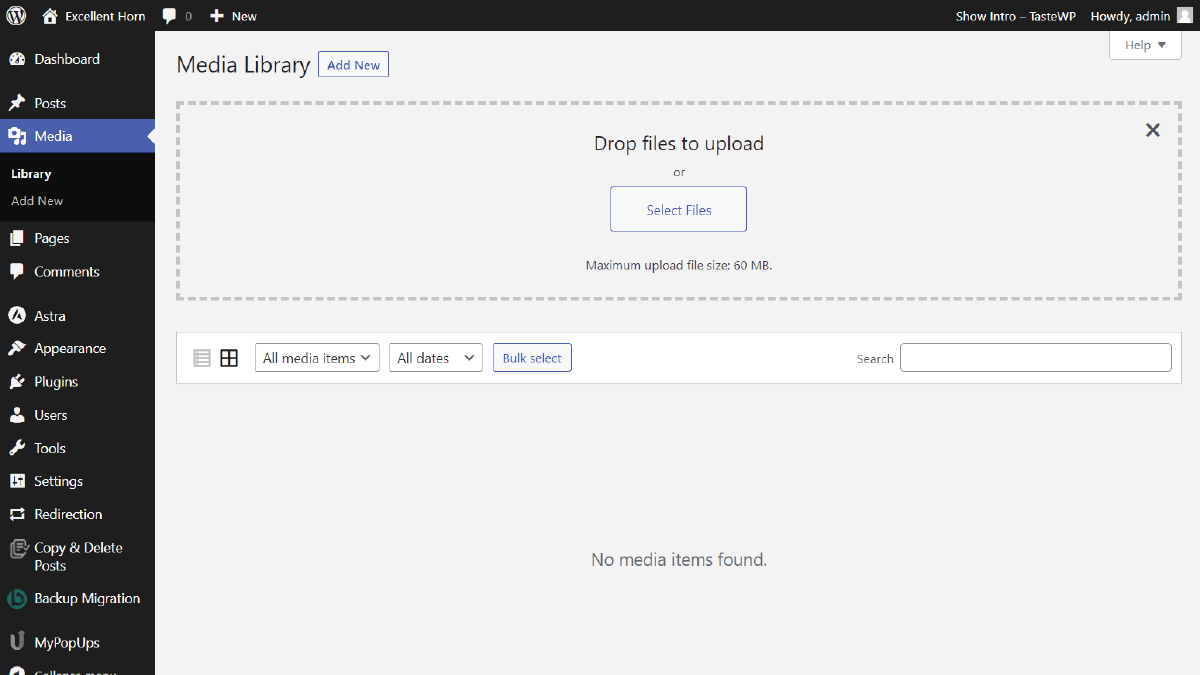
“Media” in WordPress refers to any type of media file that can be uploaded to a WordPress website, such as images, videos, audio files, and documents.
To add media to your WordPress website, you can use the “Add Media” button, which is located in the WordPress post editor. When you click this button, the WordPress media library will open, allowing you to upload new media files or select existing ones.
There are several options available in the media library, including:
- Upload Files: This option allows you to upload new media files to your website, such as images or videos.
- Media Library: This is where all the media files that have been uploaded to your website are stored. You can select files from here to use in your posts or pages.
- URL: This option allows you to use a file that is already hosted on the internet, such as an image hosted on another website.
Once you have selected your desired media file, you can add it to your post or page by clicking the “Insert into post” button. You can also edit the media file by using the options in the right sidebar, such as changing the Alt text, title, caption, description, and URL.
In summary, the “Add Media” button in WordPress provides a user-friendly interface for managing and inserting media files into your posts and pages.
Launch Your Website
The final step in creating a WordPress blog website is launching your website. This step involves making your website live and accessible to the public. Here’s what you need to do:
- Update Permalinks: Before launching your website, go to the WordPress dashboard, navigate to Settings, and then Permalinks. Select the post name option and save the changes. This will help improve your website’s SEO and make your URLs more readable.
- Check your website for broken links: Go through your website and click on all links, including internal and external links, to ensure that they are working correctly. If you find any broken links, fix them before launching your website.
- Publish Your Website: The final step is to publish your website by navigating to the WordPress dashboard, then Settings, and General. Change the site status from private to public, and your website will be live.
After launching your website, it’s time to promote it. You can do this by sharing your website on social media, submitting it to search engines, and creating backlinks.
Conclusion
In conclusion, creating a WordPress blog website is a simple and straightforward process. By following these 8 easy steps, you can quickly launch your blog and start sharing your thoughts, ideas, and experiences with the world. WordPress is a highly customizable platform that allows you to create a unique and professional-looking blog that is tailored to your needs and preferences. Whether you’re a beginner or an experienced blogger, WordPress offers a user-friendly interface that makes it easy to get started and grow your blog over time. And moreover, you will find plenty of WordPress Elementor themes for blogging websites by which you can create one with ease. So, what are you waiting for? Get started today and create your own WordPress blog website!
The WordPress theme bundle, complemented with premium Elementor themes, is a potent toolkit for crafting dynamic and visually stunning WordPress blog websites. This bundle offers a curated selection of top-tier themes designed to seamlessly integrate with Elementor, a powerful page builder. This means that users can effortlessly customize and structure their blogs with intuitive drag-and-drop functionality. The premium Elementor themes not only enhance the aesthetic appeal but also ensure optimal performance and user experience. With a diverse range of templates and styles, this bundle provides bloggers with the flexibility to create a unique online presence that captivates their audience.


